Groups
Groups organize users by geographic or organizational affiliation and make it easier to manage access. Each group can contain users with specific roles.
Open Administration → Groups to manage groups.
1. Groups list
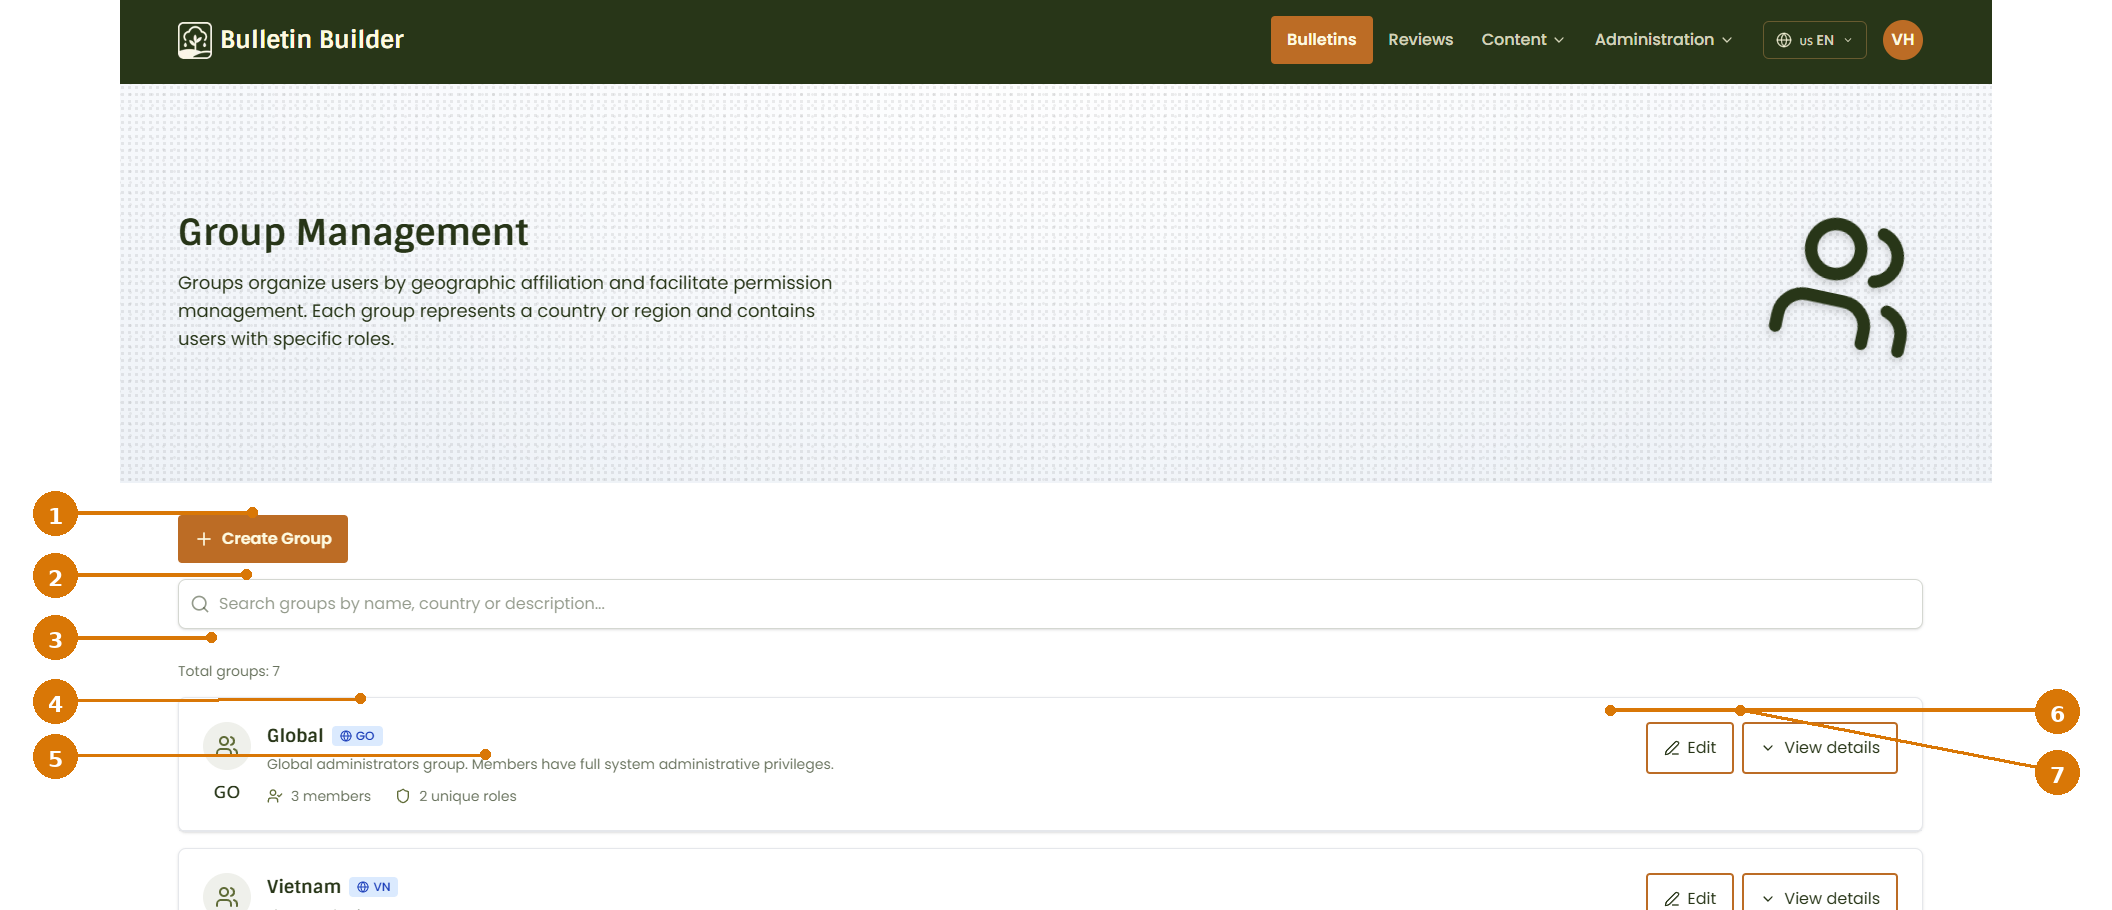
- Create Group — Opens the form used to create a new group.
- Search groups — Filters groups by name, country, or description.
- Total groups — Shows the number of groups currently available.
- Group information — Displays the group name, country code, and description.
- Membership summary — Shows the number of members and unique roles assigned in the group.
- Edit — Opens the group editor.
- View details — Expands the group to show its users and their assigned roles.
2. View group details
Click View details for a group to expand its information directly in the Groups list.
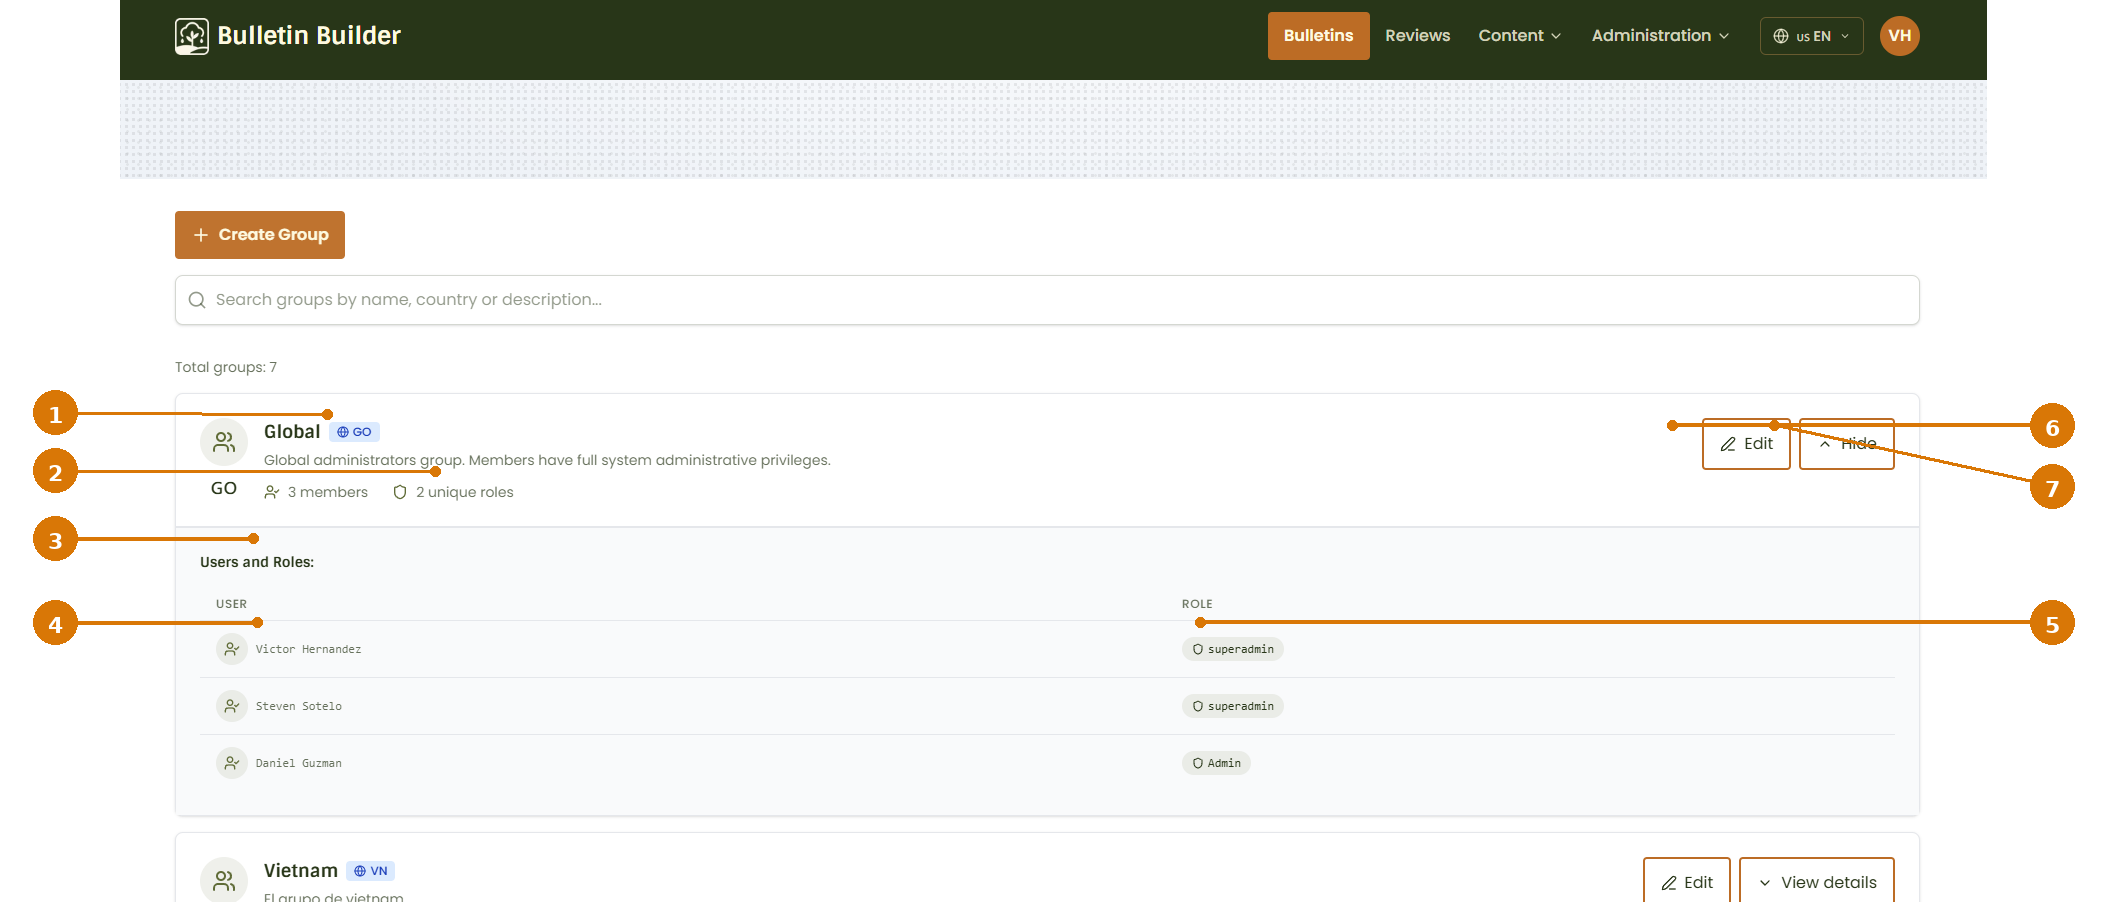
- Group information — Shows the group name, country code, and description.
- Membership summary — Shows the number of members and the number of unique roles used in the group.
- Users and Roles — Lists the users assigned to the group.
- User — Shows each group member.
- Role — Shows the role assigned to that user within the group.
- Edit — Opens the group editor.
- Hide — Collapses the expanded details.
A group can contain several users, and the role assigned to each user can be different.
3. Create a Group
From the Groups list, click Create Group.
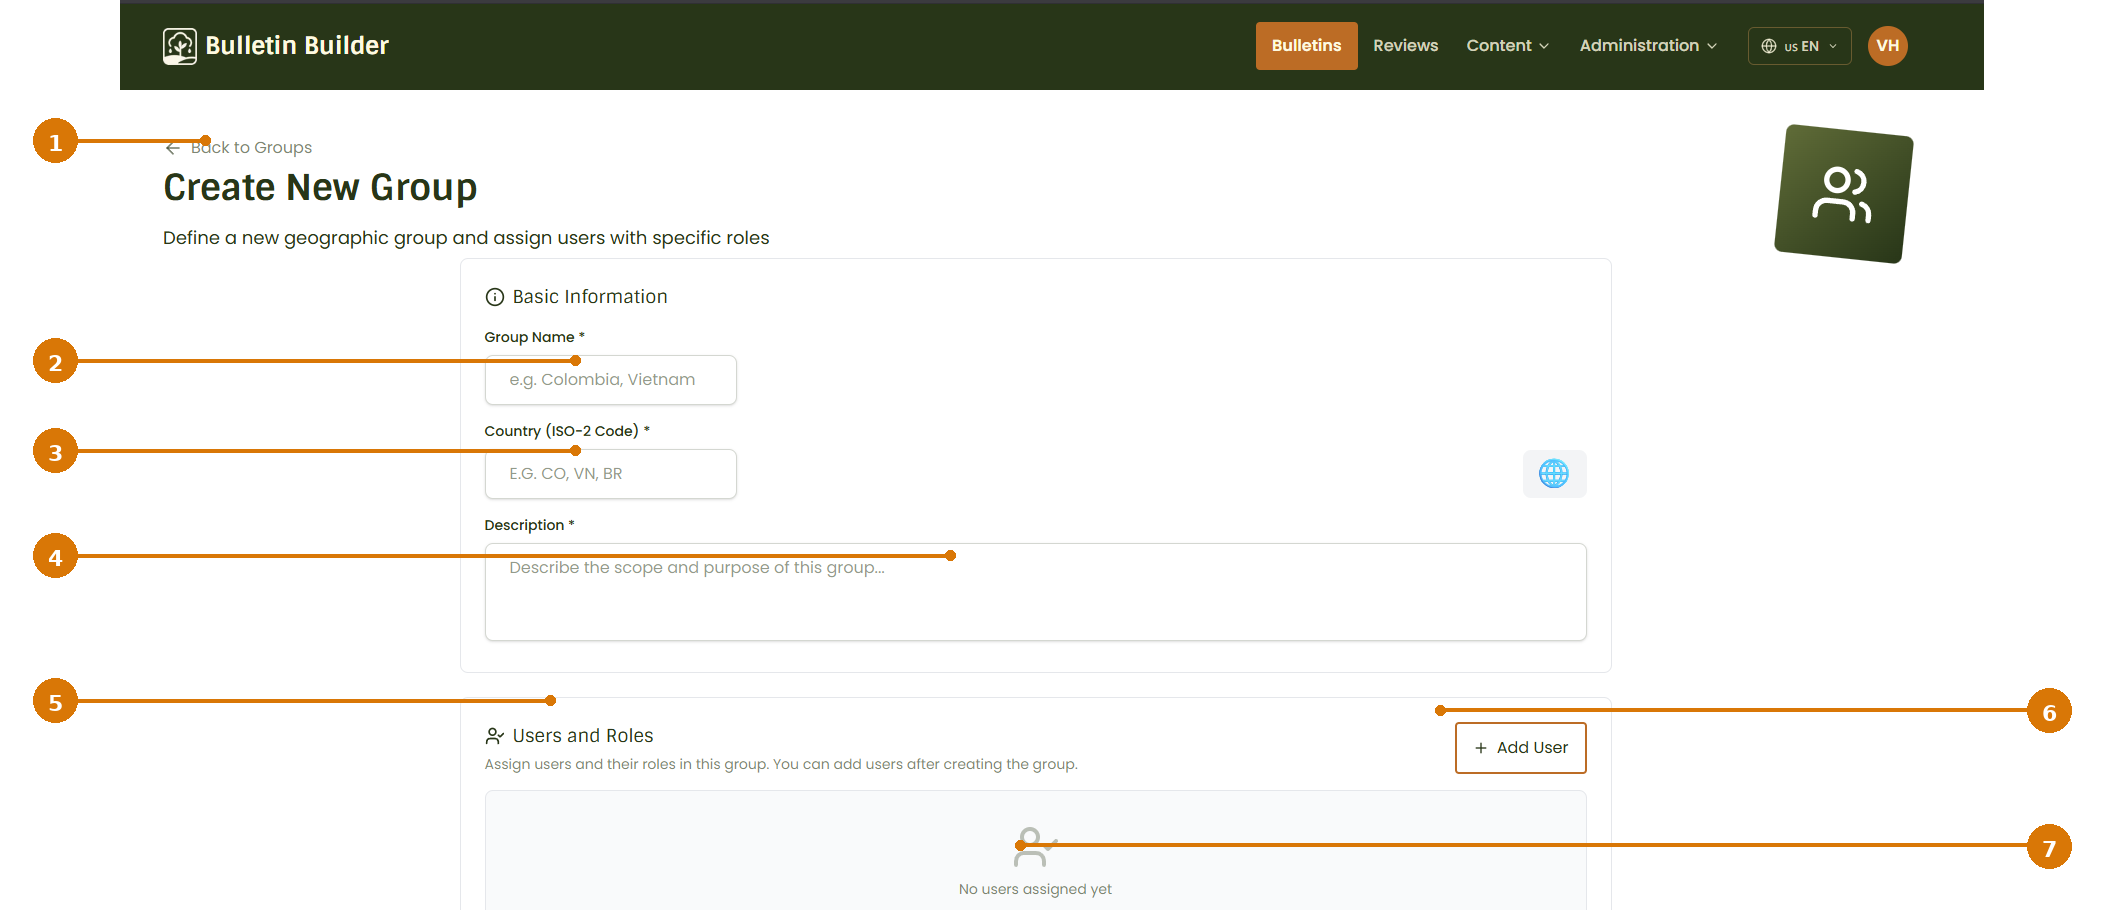
- Back to Groups — Returns to the Groups list.
- Group Name — Sets the group name.
- Country (ISO-2 Code) — Sets the short geographic code associated with the group.
- Description — Describes the scope and purpose of the group.
- Users and Roles — Contains the user assignments for the group.
- Add User — Adds a user and role assignment.
- User assignment area — Displays the users assigned to the group. A new group can initially be created without users and populated later.
Create the group
To create a group:
- Enter a Group Name.
- Enter the Country (ISO-2 Code).
- Add a clear Description.
- Optionally use Add User to assign users and roles.
- Complete the creation action at the bottom of the form.
Users can be added later
The interface explicitly allows users to be added after the group has been created, so user assignment is not required when defining the group initially.
4. Assign users and roles
Groups connect users with roles. A user assignment consists of:
- a User
- a Role assigned to that user in the group.
Use Add User to create another assignment.
The roles available in this selector come from the Role Management configuration. See Roles.
5. Edit a Group
From the Groups list, click Edit.
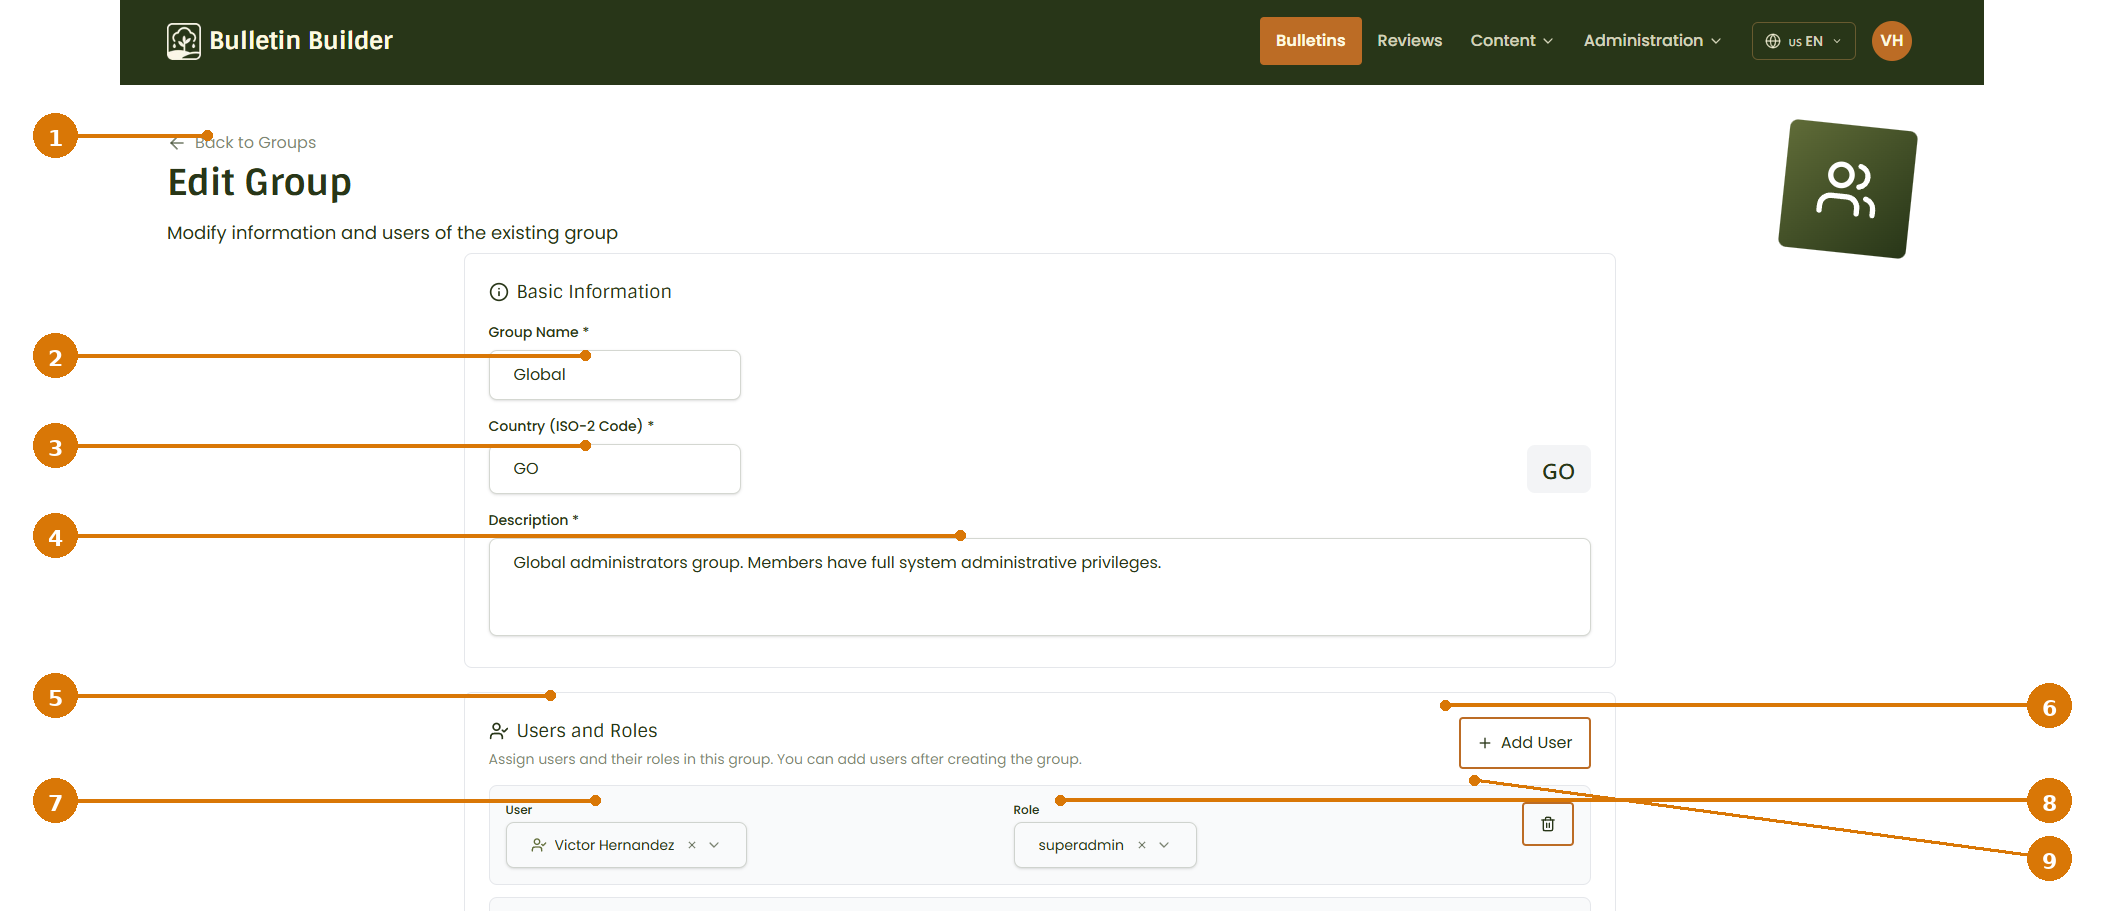
- Back to Groups — Returns to the Groups list.
- Group Name — Updates the group name.
- Country (ISO-2 Code) — Updates the geographic code.
- Description — Updates the group description.
- Users and Roles — Shows the current user assignments.
- Add User — Adds another user assignment.
- User selector — Selects or changes the user in an assignment.
- Role selector — Selects or changes the role assigned to the user.
- Remove assignment — Removes that user-and-role row from the group.
Update group information
To update a group:
- Change the required basic information.
- Add, change, or remove user-role assignments as needed.
- Review the complete configuration.
- Complete the update action at the bottom of the form.
Removing an assignment
The trash icon shown in the Users and Roles section removes the selected user assignment from the group. It does not delete the user account or the role itself.
6. Remove a user from a Group
To remove a user assignment:
- Open the group with Edit.
- Locate the user in Users and Roles.
- Click the trash icon for that row.
- Save/update the group.
This removes the relationship between the user, role, and group. It does not delete the user from the platform.
7. Groups and access control
Groups are also used by modules that support restricted access.
For example, when a Card or Template uses Restricted access, administrators can select one or more Allowed Groups. Members of those groups can then be included in the access configuration.
See Access configuration for the shared explanation of public and restricted access.