Visual Resources
Visual Resources are the images, backgrounds, and icons that can be reused throughout bulletin content.
From this module, users can upload new resources, search and filter existing resources, update their information, and delete resources that are no longer needed.
1. Visual Resources list
Open Content → Visual Resources to access the Visual Resources library.
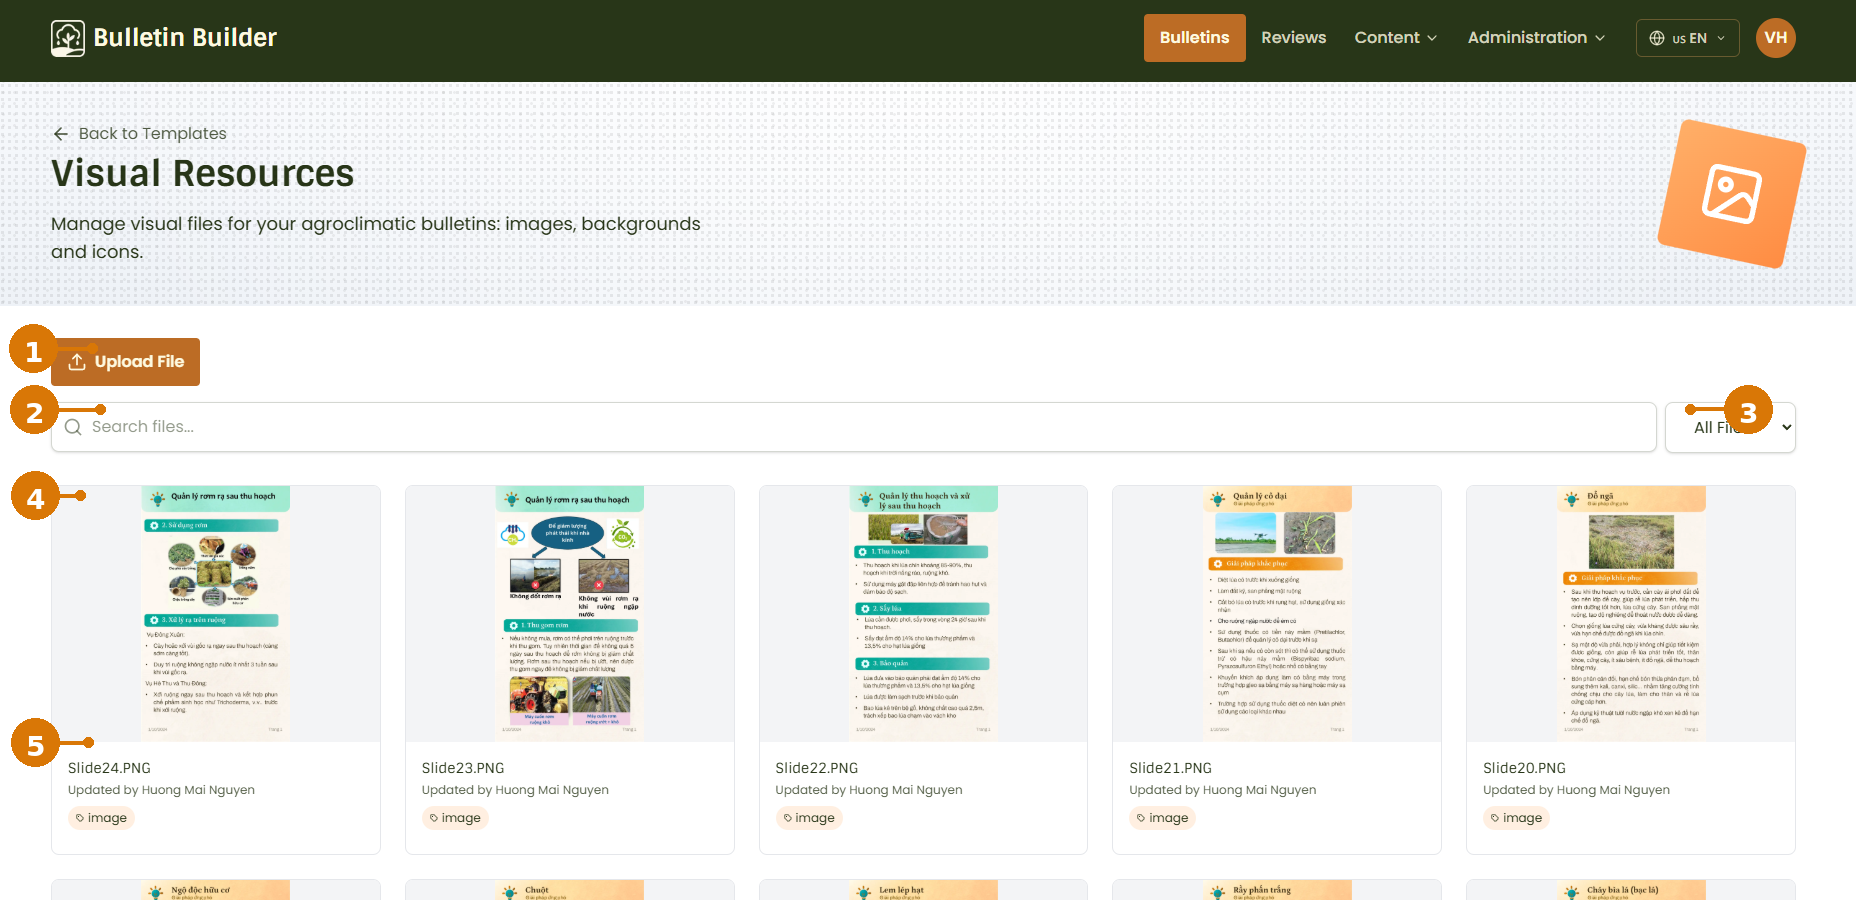
- Upload File — Opens the page for uploading a new visual resource.
- Search files — Searches the existing resources by file name.
- File type filter — Filters the resource list by resource type.
- Resource grid — Displays all available visual resources.
- Resource information — Each resource displays its preview, file name, the user who last updated it, and its type.
Resources can be managed directly from this list. Depending on the available actions, you can open a resource to edit its information or delete it.
2. Upload a visual resource
From the Visual Resources list, click Upload File.
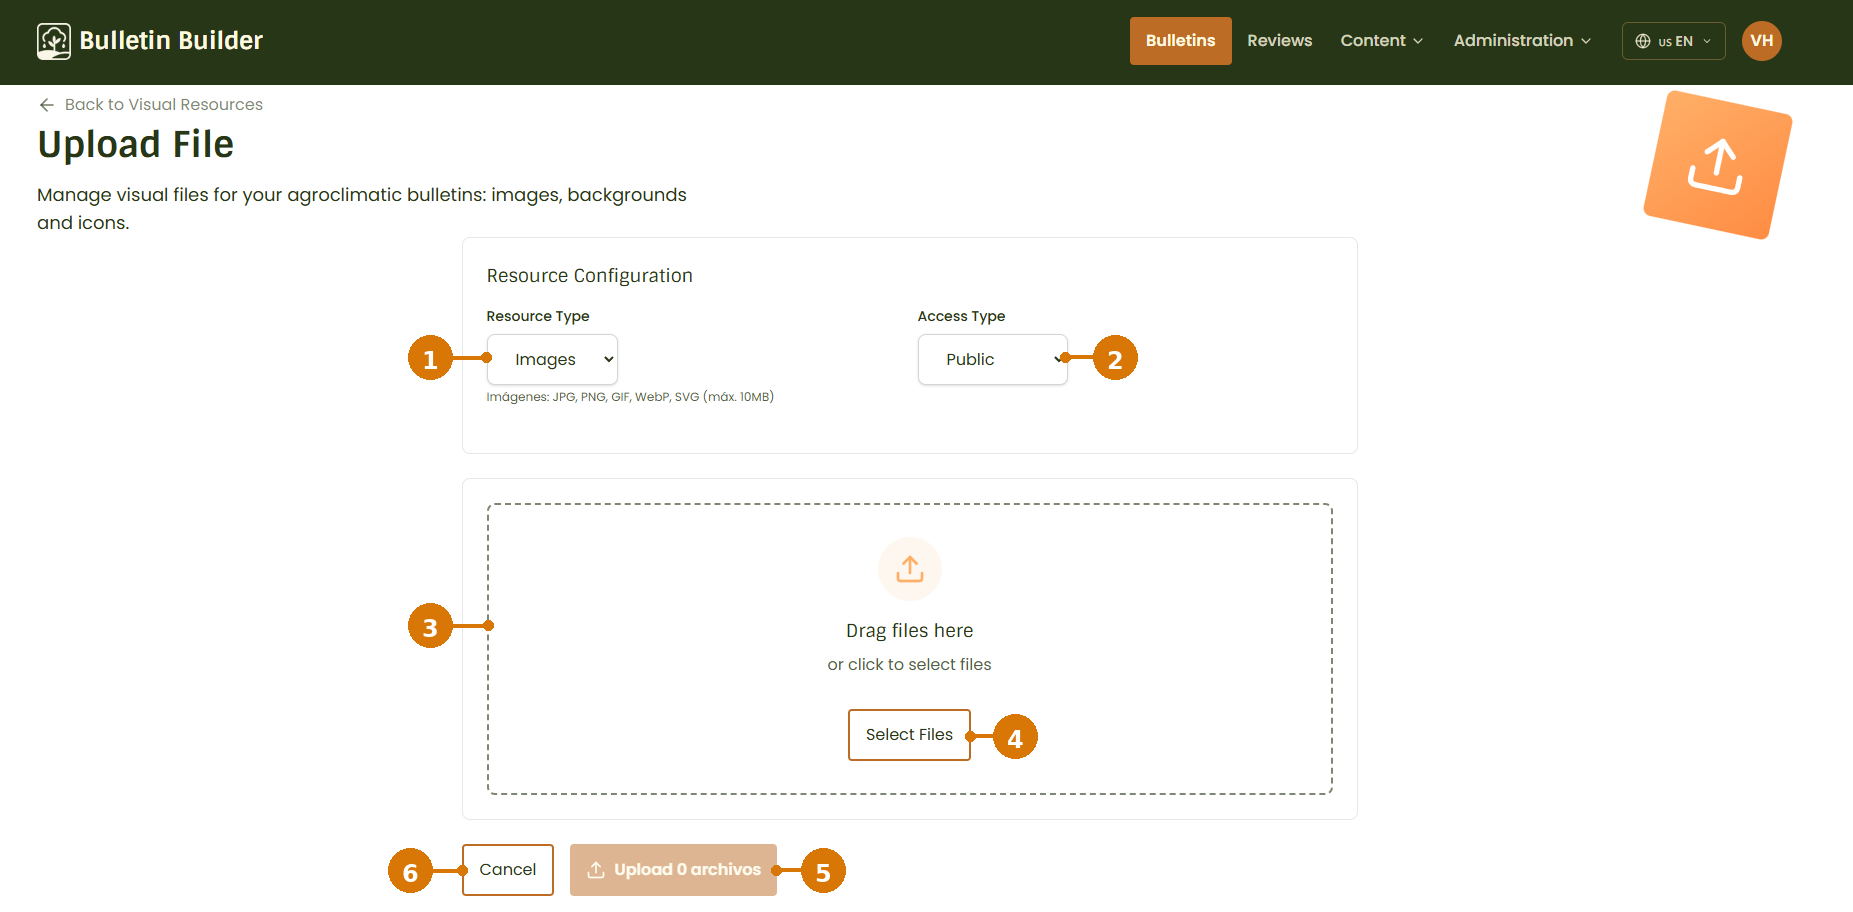
Upload configuration
- Resource Type — Select the type of resource being uploaded.
- Access Type — Define who can access the resource. See Access Configuration.
- Upload area — Drag and drop files into this area.
- Select Files — Opens your device's file browser so you can manually select one or more files.
- Upload — Uploads the selected files. The button indicates how many files are currently selected.
- Cancel — Cancels the operation and returns to the Visual Resources list.
The accepted formats and maximum file size are displayed below the Resource Type field.
For images, the following supported formats:
- JPG
- PNG
- GIF
- WebP
- SVG
The maximum file size is 10 MB per file.
Uploading files
After configuring the resource:
- Drag files into the upload area or click Select Files.
- Select the file or files you want to upload.
- Verify the number of selected files in the Upload button.
- Click Upload.
- After the upload is complete, return to the Visual Resources list to confirm that the new resources are available.
3. Edit a visual resource
Open an existing resource from the Visual Resources list to access its editing options.
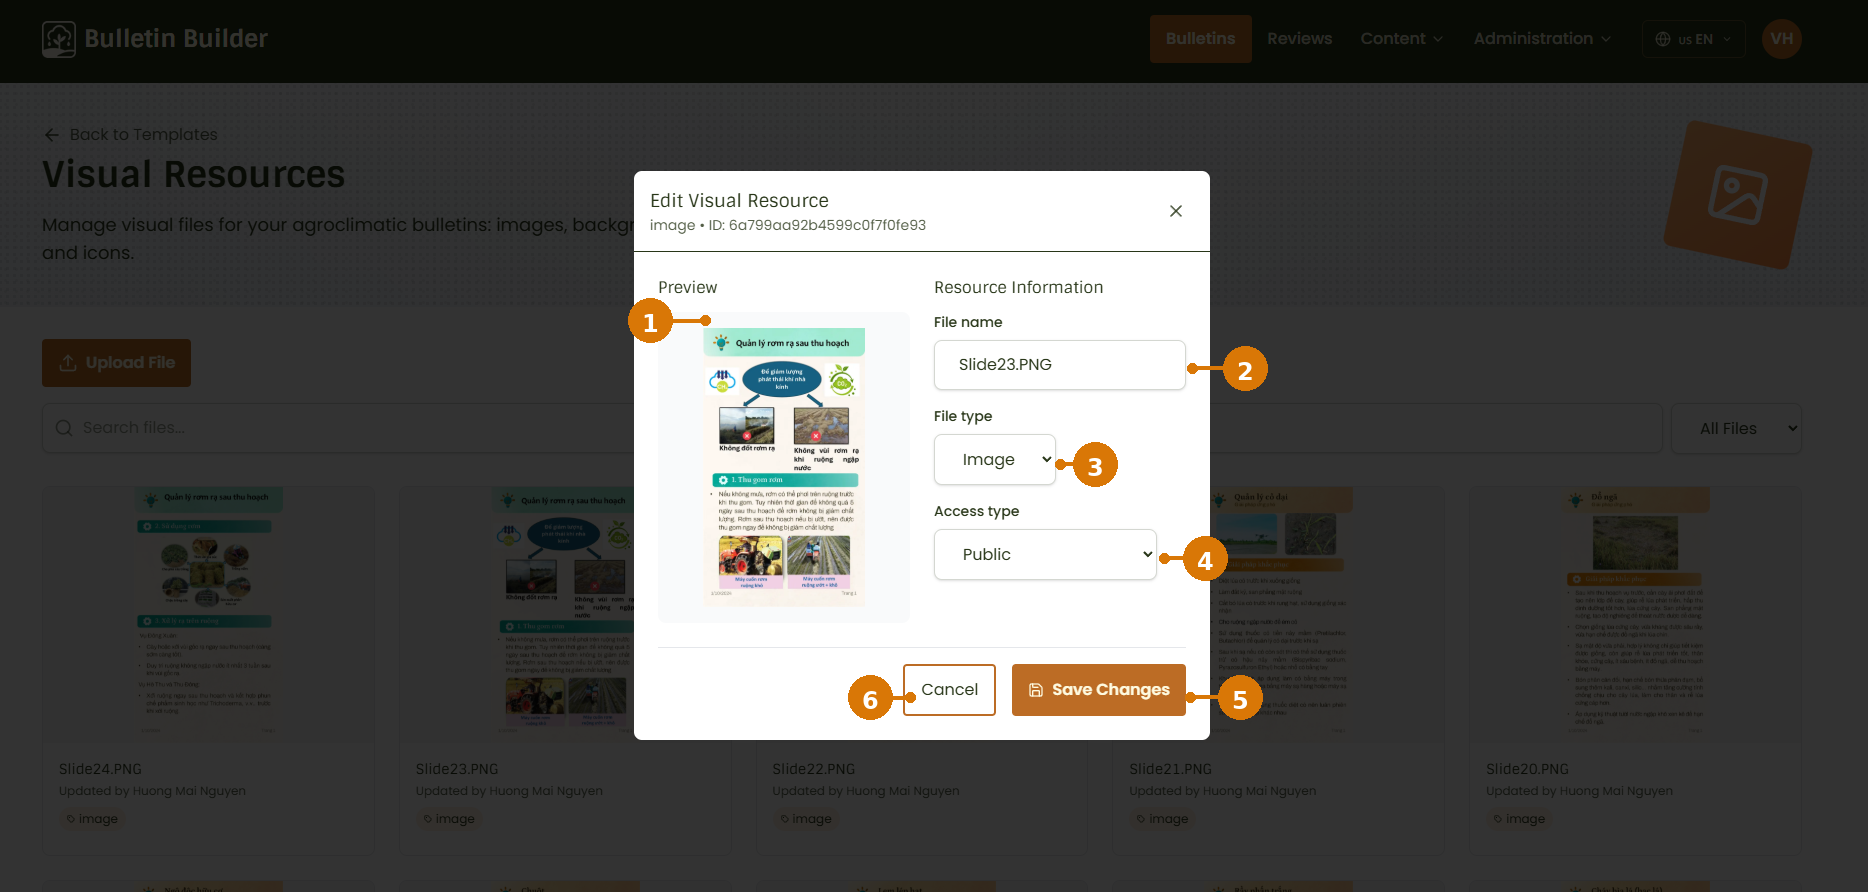
The Edit Visual Resource dialog displays the resource ID and its current configuration.
- Preview — Displays a preview of the current visual resource.
- File name — Changes the name displayed for the resource.
- File type — Displays or changes the resource type, when permitted.
- Access type — Changes who can access the resource. See Access Configuration.
- Save Changes — Saves the modifications.
- Cancel — Closes the dialog without saving the changes.
Editing a resource
To edit a resource:
- Open the resource you want to modify.
- Update the required fields.
- Review the new configuration.
- Click Save Changes.
If you do not want to save the changes, click Cancel or close the dialog.
4. Delete a visual resource
Use the delete action from the Visual Resources list when a resource is no longer required.
Before deleting the resource, the application displays a confirmation dialog.
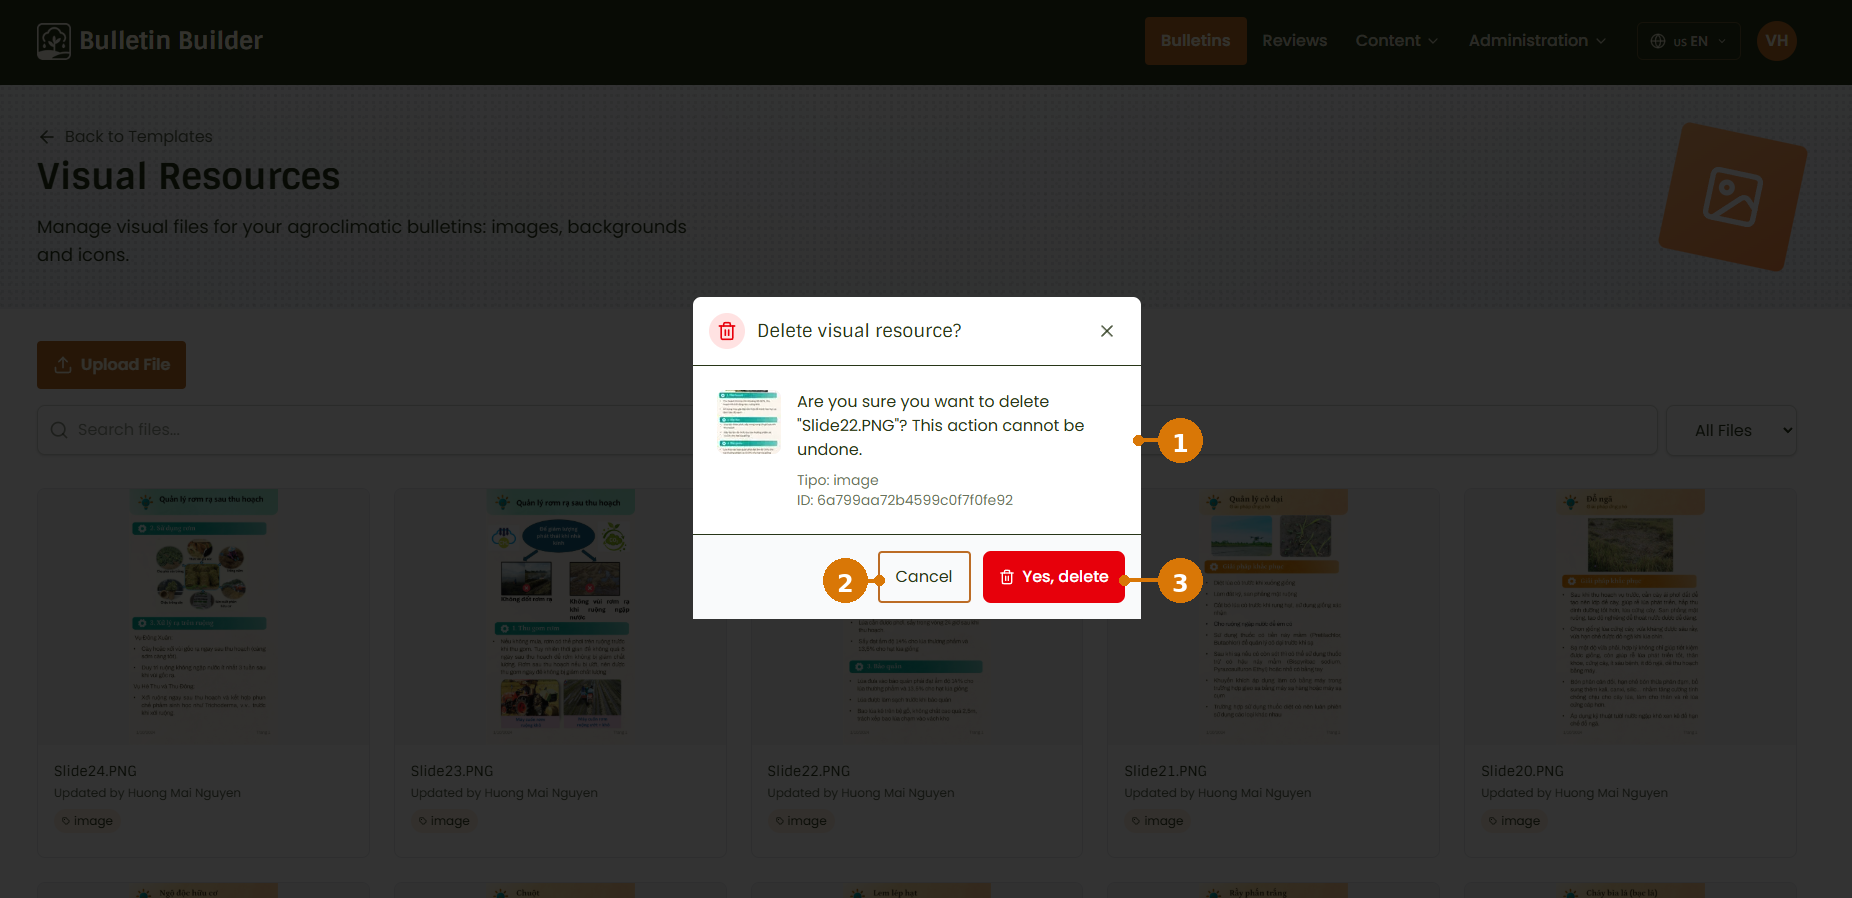
- Resource information — Shows the resource that is about to be deleted, including its name, type, and ID.
- Cancel — Closes the confirmation dialog without deleting the resource.
- Yes, delete — Permanently deletes the selected visual resource.
Deleting a resource
To delete a resource:
- Select the delete action for the resource.
- Verify the file name shown in the confirmation dialog.
- Click Yes, delete.
Permanent action
Deleting a visual resource cannot be undone. Always verify that you selected the correct resource before confirming the deletion.